Getting Start

We will start by installing adb and Helium app - at least one of those is needed for backing-up apps and restoring them.


Installing and using adb

Android Debug Bridge (adb) is a versatile command-line tool that lets you communicate with a device. The adb command facilitates a variety of device actions, such as installing and debugging apps, and it provides access to a Unix shell that you can use to run a variety of commands on a device

Getting adb working on your machine:

  1. Get adb (From android developers site or from my github)
  2. Enable debugging mode on your phone (How?)
  3. Install Google USB Driver if you haven't got them installed (How?)
  4. Open cmd and navigate to the adb file location.
  5. Run adb devices and make sure that your device is listed:
    • A successful command would look like this: adb attached device or like this: adb attached device
    • If no devices are listed, and you are getting this message: adb no attached device Or this: adb no attached device Run adb kill-server and then run again adb devices.
    • If still no devices are listed, try one of the following solutions: this or this
  6. Now adb should be working.

Installing and using Helium app

Helium is the missing app sync and backup solution for Android. Helium does NOT require root. All Android users can use Helium to backup and sync Android applications.

Helium app is not enabled when first installed on your phone. In order to enable it, one must connect the phone to a computer and run one of Helium's desktop apps. These desktop apps enable the app that is installed on the phone. Once enabled, the Helium app will function properly until the phone is rebooted (and then the app should be enabled again).

We will use Chrome to enable the app, but you may choose other platform as well. Choose your preferred platform from here.

Enable Helium Android app:

  1. Make sure that adb is set up and running, and that your phone is listed under adb devices (see Getting started with adb section).
  2. Install Helium on your phone (from Google Play or this direct link)
  3. Install Helium on Chrome browser (from Chrome Web Store or this direct link)
  4. Launch Helium app on your phone.
  5. Connect your phone to your computer, and press OK: Helium app - press ok
  6. Helium will now wait for the computer: Helium app - loading
  7. Open Chrome, navigate to chrome://apps and open Helium Backup.
  8. Now Chrome's Helium Backup will open: Chrome Helium app - open
  9. Now Chrome's Helium Backup will try to detect your Phone: Chrome Helium app - loading
  10. Now Chrome's Helium Backup is ready to use: Chrome Helium app - read
  11. Go back to your phone, and press OK: Helium app - ready
  12. Now Helium should be working, and you may unplug your phone from the computer.

Backup

From Android 4.0, Android system lets us create Android Backup files (.ab files) that contain system and user data. .ab files don't necessarily contain the local storage data (which located in the sd card), so make sure you copy the sd card content manually. .ab files may contain the app installation file (.apk file), depends on your backup preferences.

Note that some apps disable the backup option, and cannot be backed-up or restored directly. If you wish to do so for such apps, read this post or root your device.


Backup using adb

Creating an .ab backup file using adb. Partially based on this XDA thread.

Single app backup:

  1. Make sure that adb is set up and running, and that your phone is listed under adb devices (see Getting started with adb section).
  2. Run the command adb backup -f myAndroidBackup.ab com.grindrapp.android where:
    • myAndroidBackup.ab is your backup name.
    • com.grindrapp.android is your app's package name.
      The apk's package name can be viewed by apps like this.

  3. On your phone, fill in a password (if you wish) or leave blank. Press BACK UP MY DATA and wait for the process to complete.
  4. A backup file named myAndroidBackup.ab is now created on your current directory. This file can be used later on for restoration. This backup DOES NOT include the application's installation file. If you wish to keep the installation file as well, see Other backup options.
  5. If the command was failed to run, try to surround the arguments with single/double quotes: adb backup '-f myAndroidBackup.ab com.grindrapp.android' or adb backup "-f myAndroidBackup.ab com.grindrapp.android"
  6. If the backup file is empty or smaller than 2 kbs, try other version of adb, as advised here.

Other backup options:

If you wish to backup all apps at once or backup a system app, check out the following adb backup arguments/flags:

  • adb backup -f file_name
    Set the name of the created backup file to be file_name.
  • adb backup -apk|-noapk
    Choose whether to keep the app installation file inside the backup file (-apk) or not (-noapk). The default is -noapk.
  • adb backup -shared|-noshared
    Choose whether to backup the device's shared storage (SD card content) or not to. To enable it use -shared, and to disable it use -noshared. The default is -noshared. As stated above, this option doesn't work very well, and you are strongly advised to backup the SD card content by yourself
  • adb backup -all
    This is just an easy way to say to backup ALL apps, and create a full system backup.
  • adb backup -system|-nosystem
    This flag sets whether or not the -all flag also includes system applications or not. The default is -system.
  • Let's look at an example:
    adb backup -f myAndroidBackup com.grindrapp.android -apk -shared
    This command will create a file named myAndroidBackup that includes a backup, the apk installation file and the SD content of my Grindr app.
  • For the complete adb commands reference see this.

Backup using Helium

Creating an .ab backup file using Helium.

Note that Helium .ab files are slightly different from the adb .ab files, and cannot be used by the adb itself without some modifications. So if you backup using Helium, you should restore using Helium as well.

Helium backups are normal adb backups created with boolean COMPRESS_FULL_BACKUPS = false, and the 18th byte of the backup changed from 0 to 1 (I guess this is done by Helium intentionally). Android should be able to restore helium backups properly, considering that first you change 18th byte from 1 to 0. The files inside uncompressed backups don't necessarily match directly the ones in compressed format (even after decompression).
  1. Make sure that Helium app is set up and running (see Getting started with Helium section).
  2. Choose the apps you wish to backup (e.g. Grindr), check App Data Only (only if you don't wish do keep the app installation file as well) and press BACKUP: Helium app - choose app and press backup
  3. Choose Internal Storage and wait (do not touch anything, the app will do this for you): Helium app - wait while backing up
  4. When finished, the following dialog will appear (click OK and exit Helium): Helium app - backup complete
  5. Now your .ab backup file is on your phone's path ..\carbon\com.grindrapp.android\. This folder (which contains the .ab file and some other Helium stuff) can be used later on by Helium for restoration.
  6. If you get this error: Helium app - backup error there are a few solutions which are discussed here:
    • Clear Helium cache, clear Helium data, uninstall Helium, restart phone, reinstall Helium and try again.
    • Plug/unplug phone trick (See this).
    • Plug/unplug phone trick (See this).
    • Backup the app as shown in Backup using adb section, and then try again using Helium.

Restore

After creating .ab backup files using adb, we can restore them at any time.


Restore using adb

  1. Make sure that adb is set up and running, and that your phone is listed under adb devices (see Getting started with adb section).
  2. Make sure that the app you wish to restore is installed on your phone. This, in case you chose to backup data only (which means that adb will not install the app for you).
  3. Run the command adb restore myAndroidBackup.ab where:
    • myAndroidBackup.ab is your backup name.
  4. App(s) is now restored.

Restore using Helium

Note that Helium .ab files are slightly different from the adb .ab files, and cannot be used by the adb itself without some modifications. So if you backup using adb, you should restore using adb as well.
  1. Make sure that Helium app is set up and running (see Getting started with Helium section).
  2. Make sure that the folder backup of the app you desire to restore is on your phone: PhoneRootPath\carbon\app.package.name\.
  3. Open Helium, and go to RESTORE AND SYNC tab: Helium app - choose restore tab
  4. Tap Internal Storage: Helium app - choose internal storage
  5. Choose the apps you're willing to restore and press RESTORE: Helium app - choose apps to restore
  6. Wait for the proccess to complete (do not touch anything, the app will do this for you): Helium app - restoring
  7. App is restored: Helium app - restored
  8. You're done. You might need to log-in/sign-in to the restored app after a successful restore.

Advanced

We know how to create .ab files that can be restored by adb or Helium app (but not both!). In some cases we will need to convert one type of backup to the other. In order to view a backup's content or modify it, we must convert it to a .tar archive. If we wish to restore our backed-up or modified data, we need to repack it as an .ab file.


Convert .ab backup file to .tar file and vice verca

Dealing with .ab files is not straightforward, and might be a bit tricky. I'll show you some methods and you are advised to try them all.

helium_ab2tar method

This is a small utility that I have found, and it works pretty well on my Windows 8 machine.

You can compile the code by yourself (files are here), but I have already done this for you. Check out my compiled files. All the .exe files are there. If you fail to run them, you'll have to compile them by your own using this post:

Hi, the "helium_ab2tar" (https://github.com/floe/helium_ab2tar) finally helped me. Good work! I was running Win7 and didn't have any C compiler installed, so here is what I found:

  1. from the link above, extract helium_ab2tar-master.zip to a new directory
  2. from here download Binaries and Dependencies and extract files make.exe, libintl3.dll, libiconv2.dll to your helium_ab2tar-master directory
  3. from https://bellard.org/tcc/ download a recent TinyCC build and extract the whole zip into your helium_ab2tar-master directory
  4. edit the makefile and change "CC=gcc" to "CC=tcc\tcc.exe"
  5. change "-o ab2tar_cut" to "-o ab2tar_cut.exe", "-o ab2tar_corr" to "-o ab2tar_corr.exe", "-o tar2ab_cut" to "-o tar2ab_cut.exe", "-o tar2ab_corr" to "-o tar2ab_corr.exe"
  6. finally run make.exe
  • To convert .ab file to .tar file, run ab2tar_cut [.ab file] [temporary file] and then run ab2tar_corr [temporary file] [.tar file]
  • To convert .tar file to .ab file, run tar2ab_cut [.tar file] [temporary file] and then run tar2ab_corr [temporary file] [.ab file]
  • That's it. The hard part is actually compiling the executables on your platform.


android-backup-tookit methods

This is a another utility that I have found, and it will work on any platform (Thank you JVM). You can download the files from sourceforge or from my github. Search for the needed .jar file inside the directories you have just downloaded.

Most of the information below was adopted from this xda thread. If you have issues, read the whole thread.
Adb .ab backup to .tar using abe.jar
  1. Make sure you've got Java installed.
  2. Run the command 
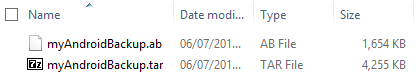
java -jar abe.jar unpack myAndroidBackup.ab myAndroidBackup.tar [password] where:
    • myAndroidBackup.ab is your backup name.
    • myAndroidBackup.tar is your .tar that will be created.
    • [password] is your backup password. Leave blank is no password set.
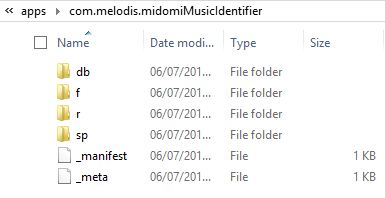
  3. A new .tar file is now created, which contains your data.
Healium .ab backup to .tar
  1. Make sure you've got Java installed.
  2. Run the command java -jar hbe.jar -force myHeliumAndroidBackup.ab
    Or the command java -jar hbe.jar -tar myHeliumAndroidBackup.ab
    where:
    • -force/-tar means that either -force or -tar arguments should work. Try both.
    • myHeliumAndroidBackup.ab is your backup name.
  3. A new .tar file is now created, which contains your data.
  4. If exceptions are thrown:
    • take a look at this:
      I realized that it works if I import the project to Eclipse and use the -force flag. I looked to see what Eclipse's execute command was. Turns out if I add "-Dfile.encoding=US-ASCII", then everything works fine. Not sure why, though.
      Ex: java -Dfile.encoding=US-ASCII -jar hbe.jar -force myHeliumAndroidBackup.ab
    • Make sure you did not set any password during the backup process, or don't have any default password set for backups.
    • Debug the java code by yourself and find out what's the Exception source. The code is pretty short and not very complicated.
.tar to .ab
  1. Make sure you've got Java installed.
  2. Run the following command java -jar abe.jar pack myAndroidBackupTar.tar myAndroidBackup.ab [password]
    Or the following command if you got Android KitKat (4.4 – 4.4.4) java -jar abe.jar pack 4.4.3+ pack-kk myAndroidBackupTar.tar myAndroidBackup.ab [password]
    where:
    • myAndroidBackupTar.tar is your backup archive.
    • myAndroidBackup.ab is your backup name that will be created.
    • [password] is your backup password. Leave blank if no password set.
  3. A new .tar file is now created, which contains your data.


Using dd (Unix)

dd is a command-line utility for Unix and Unix-like operating systems whose primary purpose is to convert and copy files.

Adb .ab backup to .tar using dd
  1. Run the command dd if=myAndroidBackup.ab bs=1 skip=24|openssl zlib -d > myAndroidBackup.tar where:
    • myAndroidBackup.ab is your backup name.
    • myAndroidBackup.tar is your .tar that will be created.
  2. A new .tar file is now created, which contains your data.


View and modify .ab backup file content

After converting an .ab file to a .tar file, we can view and modify the .tar content, and then repack the .tar file as an .ab file that can be restored. This way, we can modify internal user data that cannot be accessed without root. Data such as internal DBs, preferences files, cache and so on.

If you want to read more, check out this post.

Let's take a look at an example:

  1. Iv'e used adb to backup an app called SoundHound, and then I converted the .ab file to a .tar file. You can see that the backup file was compressed, and that after converting it to a .tar file it was decompressed. Advanced - ab and tar
  2. Lets extract the .tar file, and take a look at its content (the .tar contains a single folder named apps): Advanced - tar content
    • db/ folder contains databases.
    • f/ folder contains app files.
    • r/ folder contains some cached data.
    • sp/ folder contains shared preferences files.
    • a/ folder contains the application installation file (which is not present here, since I had omitted the -apk flag during adb backup).
    • _manifest file contains the app's version code, the platform's version code, a flag indicating whether the archive contains the app APK and finally the app's signing certificate (called 'signature' in Android API's). It's not the regular AndroidManifest.xml file.
  3. I replaced the file userImage.png inside the f/ folder: Advanced - edit tar
  4. I also edited some settings in the application_settings.xml inside the sp/ folder: Advanced - edit tar
  5. I repacked the folder into a .tar file.
  6. I converted the .tar file back to an .ab file.
  7. Then I used adb restore command to restore my modified data.
  8. Now my profile picture is changed, as well as some settings: Advanced - result
  9. This particular scenario of changing my profile picture is, obviously, not very interesting. But you could modify databases, extract protected files and so on.

Summery

So this is what I have learnt in the past several years as an Android user. I hope it will help you when in need.


Contact me

If you have any questions, remarks or anything else you wish to tell me - feel free to mail me or create an issue on my github page.

Happy hacking! :)

Comments